General interface
Figure 1: Home page
Menus description
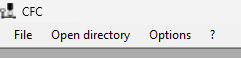
- File
- New: to launch a new test
- Quit: to exit the software
- Open folder: opens the folder where test files and software configuration are saved
- Options
- Parameters: editable parameters of the software
Options
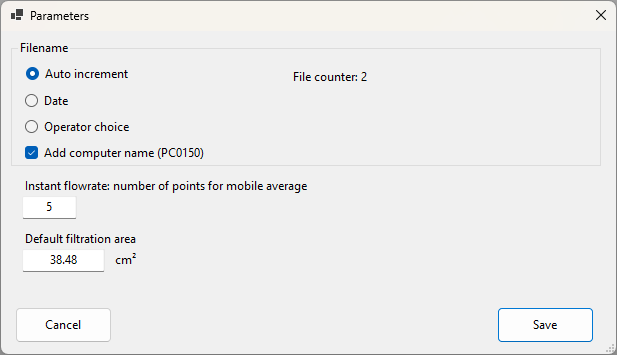
Figure 2: Editable parameters
File name
Default file name may be defined automatically according to three rules:
- Automatic incrementation: the next file name will be taken from a counter (displayed opposite)
- Date: the next file name will be determined as a function of the date,
following the scheme
YYMMDDHHmmss - User choice: the file name will be determined by the user
If the Add PC name box is ticked, the suffix with the Windows name of the PC will be added to the file. This makes it possible to differentiate between auto-incrementing file names if several PCs are using the software.
Example: 1337.PC0007.cfl
Instantaneous flow rate
The test monitoring interface shows the evolution of the instantaneous flow rate as a function of time. To avoid distorting the graph, a moving average is used.
Filtration surface
Filtration surface is a parameter required for the calculations. You can enter the default value here. It remains editable and may be modified at the beginning of each test in case the user has several cells.
Start a test
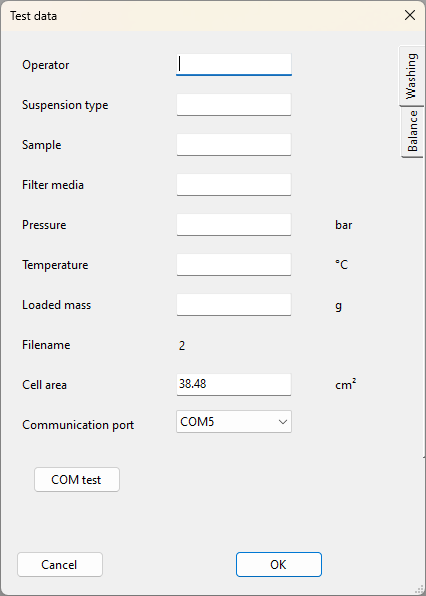
Figure 3: Data required to start a test
- File > New — the window shown above appears.
- All fields are mandatory.
- The following fields require digits only: Pressure, Temperature, Loaded mass, Cell surface.
- Testing communication with the scales is required (use COM Test).
- Click OK.
The software automatically checks the values and notifies the user in case of a missing or odd value. When all fields are properly completed, the test launch screen (Figure 6) appears.
Additional options
Additional options may be displayed by clicking Washing or Scales.
The software accepts a maximum of 3 washing phases.
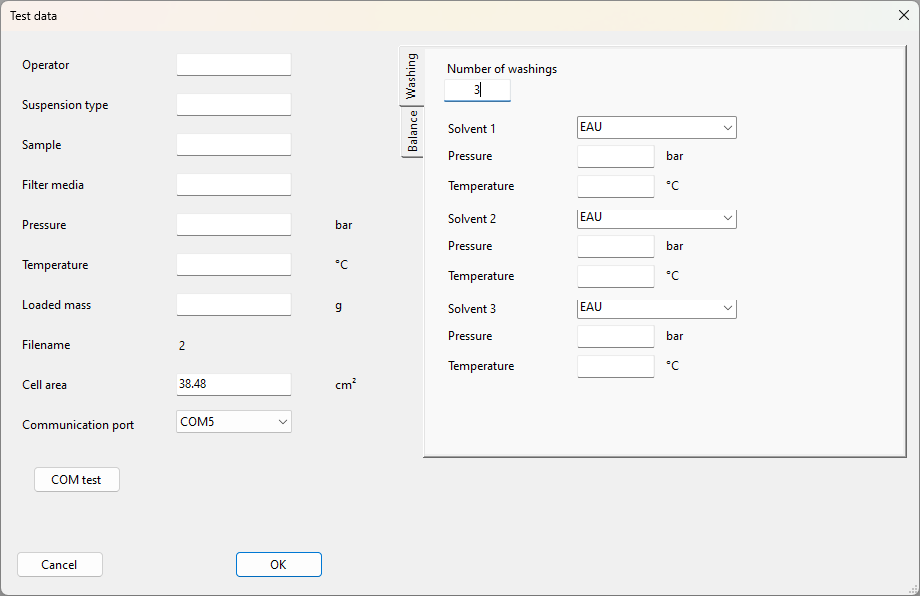
Figure 4: Additional options - Washing
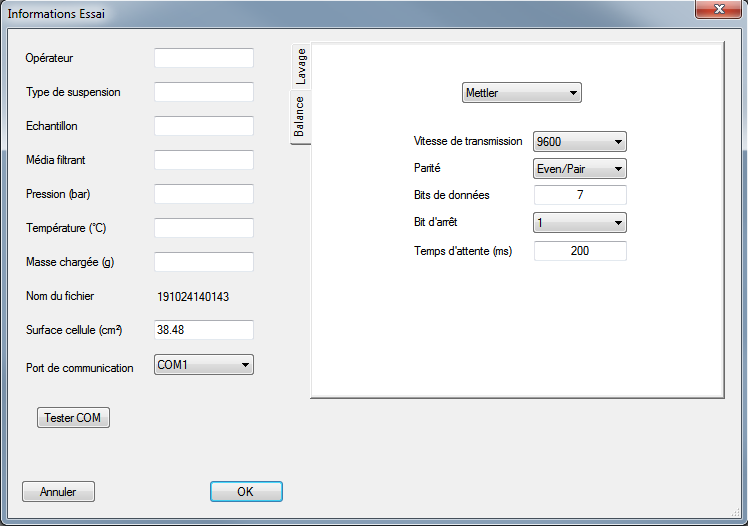
Figure 5: Additional options - Scales
Test launch
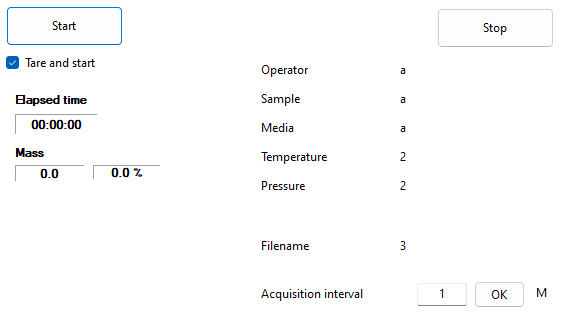
Figure 6: Test launch screen
The test monitoring screen displays the information entered previously and waits for an action by the operator before starting.
After clicking Start, the software continuously reads the value from the scales and starts acquisition once a mass superior to 0,3 g is detected.
By default, the software offers to tare the scales at the start of acquisition. If the operator chooses not to tare the scales, acquisition can start immediately.
Test progress
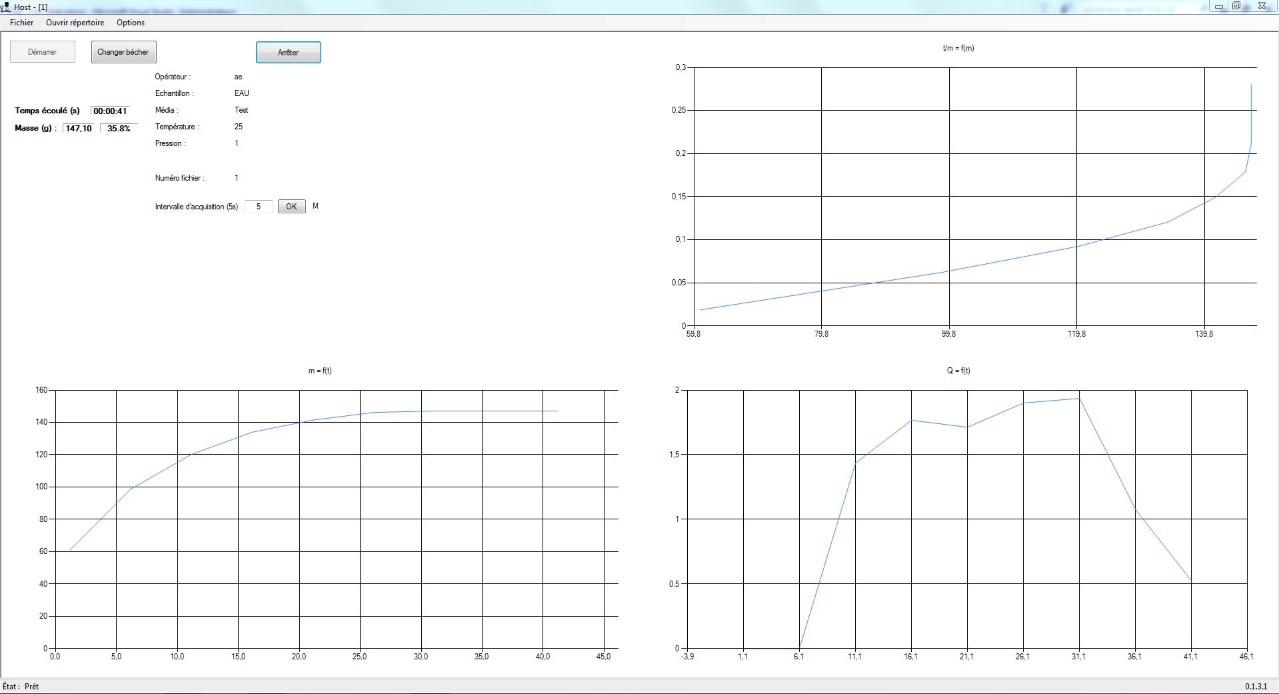
Figure 7: Test progress — chart t/m vs m, chart Qinstant/avg vs time, chart filtrate mass vs time
- Beaker change: is used to pause acquisition in order to carry out manual actions on the scale, the cell or the beaker. Then, press the button again to restart the acquisition. Changing the beaker can also be used to split the filtrate during a wash. It is interpreted as such on versions 1.2.x.x of the CellFit processing software.
- Acquisition interval: you can change the acquisition interval during the test to obtain more or fewer points.
- Stop: stops the test after confirmation by the operator.
The final test file is generated in the folder of the software (by default:
My Files/IFTS/CFC/). After that, the file may be processed with CellFit to see
the results and/or generate a report.